June 28, 2014

A Perfect Gel Manicure at Home!

Welcome to the final post of my three part series on The Perfect Manicure At Home!


DIY Shellac/Gel Nail Polish Manicure

I tried to Shellac/Gel my own nails and it was quite a challenge to be honest. But I think I'll get the hang of it after a few times. My friend helped me by taking pictures as I attempted the application my first time... Problem was, I forgot a few steps! Goodness Gracious! It didn't turn out perfect but I was impressed with the shine and lustre of the polish!

After a few days the imperfections were bothering me. And because I forgot to cap my nails for each layer of polish it started to chip on one finger. So I removed the gel polish and tried again. The pink "Gotcha" is the updated colour and the purple "Grape Gum" was the original attempt. I believe this is something I could get used to. Commit to the full two hours of prep, polish, cure- and you're ready to go! I can't think of any cons for this idea. Except, maybe, if you're not serious about it, then you probably won't be happy. It takes time to learn your own technique... That being said, it's much more efficient than the traditional stuff. With regular nail polish, you can let it dry for an hour and still end up with smudges..? This is NOT the case with gel polish!

For a full tutorial on how to DIY Shellac/Gel your nails, go to Lulu and Sweet Pea and check out Melissa's awesome step by step perfection! She covers technique and professional tips! :)

I found most of my equipment on eBay, Amazon. And so many amazing colours at Nail Polish Canada!


Here's my run down...

1. Apply sunblock with a high SPF about 20 minutes before you use the UV light. Use Quench Nail & Cuticle Oil and Easy Peasy Hand & Nail Salve for a luxurious manicure. Push back & trim cuticles. Trim & file nails to desired length.

2. Wash Hands with warm soap and water.

3. Buff and file nails again, focussing on the cuticle area. Be sure to smooth away dry skin. File nail beds lightly to create a scratchy surface for better product adhesion.

4. Use an alcohol or nail cleanser soaked lint free wipe to remove dust from nails.

5. Apply a primer. This is to prepare nail surface for any liquid or gel polish. This kind of product also enhances adhesion.

6. Apply base coat. Be sure to Cap/Seal the nails first. Then paint the entire nail area. Cure for 2 minutes... Wipe nails with an alcohol or nail cleanser soaked lint free wipe. ( Melissa from Lulu & Sweet Pea says to use a dry wipe- however, I found with the Gelish brand that the dry wipe left a residue and I had to go over it again with a soaked one. I encourage you not to skip this step. It gives you a smooth surface to work on rather than a tacky layer.)

7. Apply colour coat. Be sure to Cap/Seal the nails first. Then paint the entire nail area. Cure for 2 minutes...
8. Apply one or two more colour coats. Be sure to Cap/Seal the nails before each layer. Then paint the entire nail area. Cure 2 minutes for each layer... (Tip: do three layers for good measure)

9. Apply top coat. Be sure to Cap/Seal the nails first. Then paint entire nail area. Cure for 3-5 minutes... (Tip: I like to go for five whole minutes this last round. I found that 2-3 minutes didn't quite cure the gel polish enough)

10. Use an alcohol or nail cleanser soaked lint free wipe to remove the tacky layer...

11. Wash hands with warm soap and water. Apply Quench Nail & Cuticle Oil and rub in...


Remember to CAP those nails or you will have early wear and chipping. For a great tutorial on how to CAP aka SEAL the nail's free edge, go to Manic Talons post on nail advice which includes pictures and a clear explanation of what exactly capping the nail means.

I personally didn't learn this step when I took cosmetology in high school. But it's a good trick to know for any kind of manicure. Since I forgot to CAP my nails for the base and first colour coat... my first gel manicure didn't turn out as well as I'd hoped. Fast forward four attempts and it's working out better.

Grape Gum by CND


Here's a picture of one of the flaws from my first try. It went on wonky for this thumb so when I did the final wipe a streak of gel polish came off too. There were also bubbles caught in the gel and early chipping since I forgot to Cap the nails for each layer...

And, here's a picture of my second try! Nearly flawless! It's just gonna take a little more practise for me to get my technique and flow in order. :)
Gotcha! by CND

So that's it! I have yet to see if it lasts two weeks like all the hype. I am obsessed with trimming my cuticles so after a week I remove the gels and start fresh. My nails are seeming stronger and growing long.

I know you want to try it out. Go ahead. Give yourself some love and do a home mani! Your hands with look gorgeous! Have fun!

I hope you enjoyed this series. It was definitely time well spent for me... :)

XOXO

Angélique

June 25, 2014

Homemade Nail & Cuticle Oil

Welcome to the second post of my three part series on The Perfect Manicure At Home!


Say Hello to a Simple DIY Cuticle Oil


So, like I told you before here are a few reasons why doing my nails at home is important to me...
  • Creative/Fun
  • Money Saving (compared to salon visits)
  • Quality Control (using homemade & natural essentials)
  • Time Saving
  • Challenging/Mindful
  • It's my Girly Obsession!

Okay, let's get started on how to make your own cuticle oil... First, gather your ingredients and tools.

Ingredients, Empty Nail Polish Bottles, Dropper & Mini Funnel

"Quench" Cuticle Oil

2 Tsp Jojoba Oil
1 Tsp Avocado Oil
1 Tsp Cucumber Oil
1/2 Tsp Vitamin E

5 Drops Lavender Essential Oil
3 Drops Eucalyptus Essential Oil
2 Drops Tea Tree Essential Oil


Measure out the carrier oils into a measuring cup...
Warm in microwave for 20 seconds or so... just enough to help the oils blend.

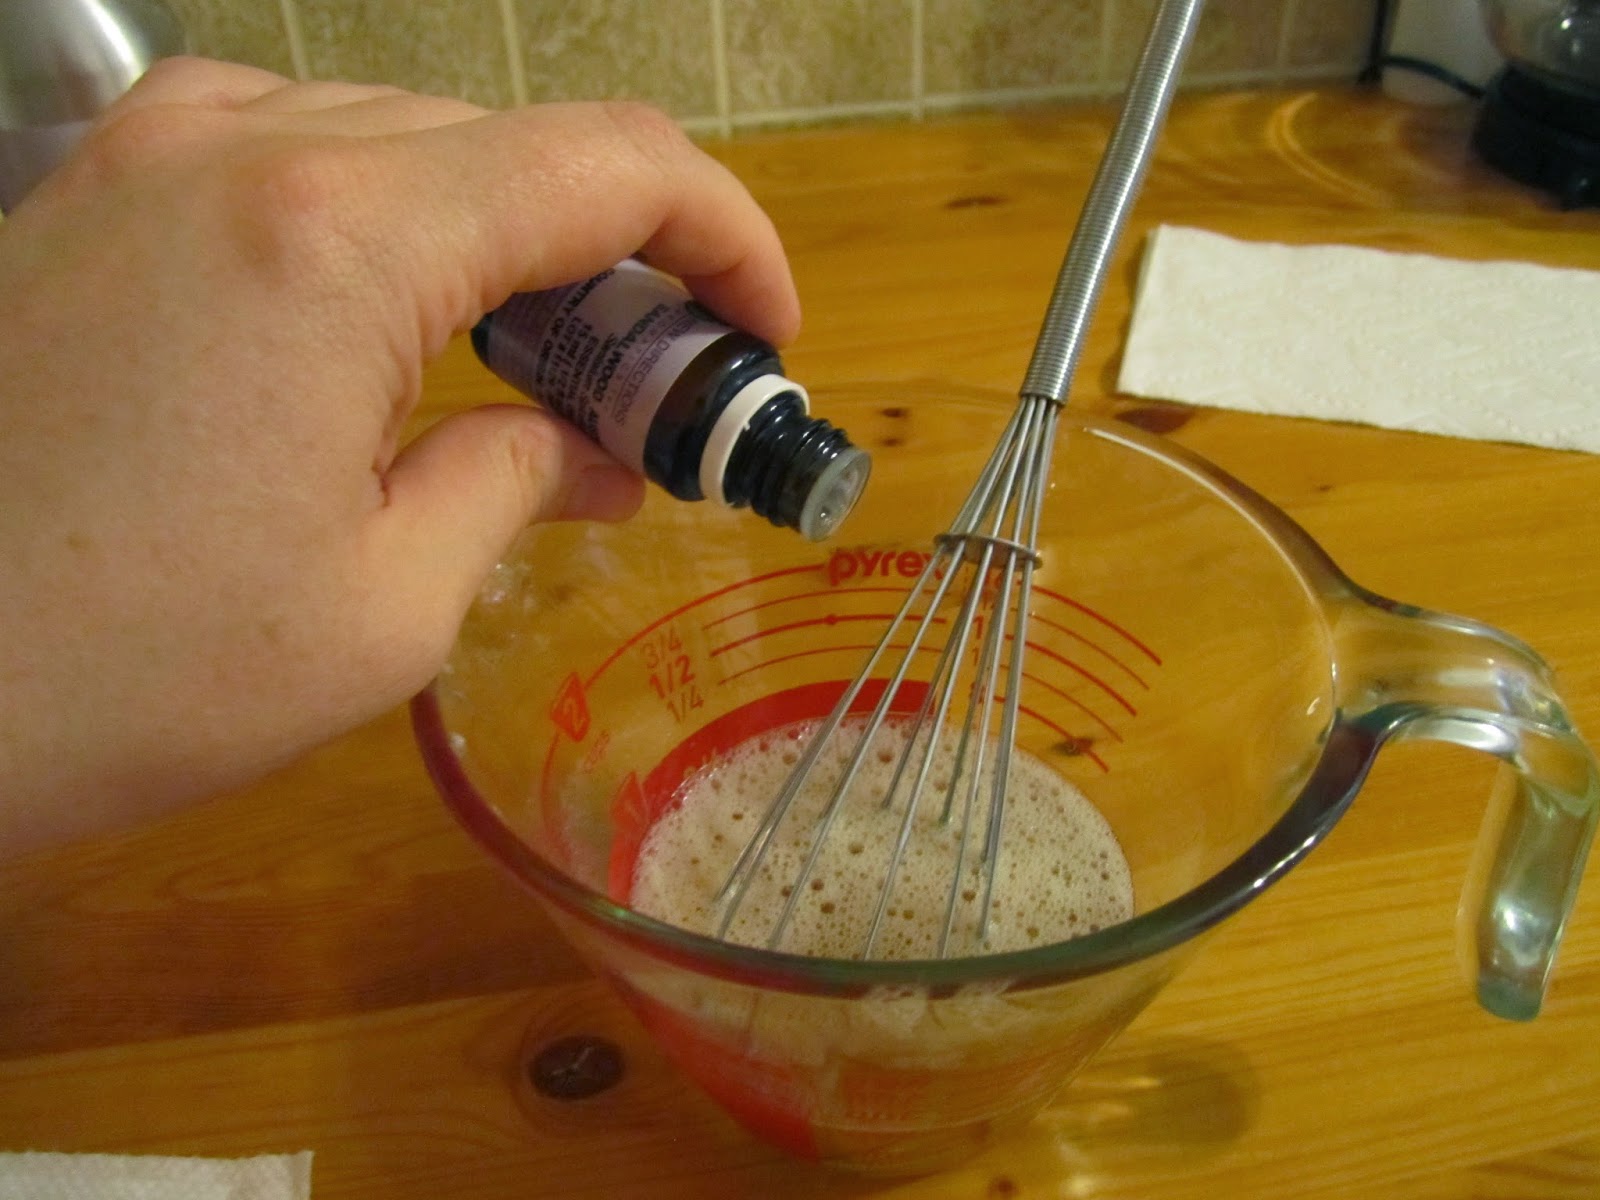
Remove from microwave and stir gently. Now, add the vitamin E and essential oils and stir again.


Place the mini funnel in the empty nail polish bottles and pour the oils in.
If you're wondering where to find empty nail polish bottles or those nifty mini funnels go here and there...


Cap the bottles and you're good to go! It's that simple! :)

Maybe share one with a friend...

This recipe makes 1 ounce. And the empty nail polish bottles hold a half ounce each.

I chose the ingredients based on two important credentials. First, everything in this recipe is great at softening and protecting the cuticles and nail. And second, when using a UV light to cure Shellac/Gel or even dry a regular manicure, the ingredients in this cuticle oil aid in UV protection.

Plus! If you're using it daily this cuticle oil will encourage strong, healthy nail growth.

The one thing I particularly wanted out of a cuticle oil is something that didn't cause my cuticles and the skin around my nails to peel. I opt to stay away from those nasty products known as cuticle erasers... Seriously, all you need to remove the excess cuticle is a hydrating, nourishing & healing blend of oils, a warm hand soak and cuticle clippers.

Here's my nails soon after using the cuticle oil. Plus, I've been using my "Easy Peasy" Hand & Nail Salve daily so my hands and nails are super healthy and growing like crazy! This picture was taken after a trim and manicure, with the cuticle oil being the last thing I used before taking the shot. I'm quite happy with both of these recipes.


So that's it! I'm sure you guys are gonna try this one!

Be sure to use before and after each time you use a UV light either to dry or cure nails. Use daily, as often as you like.

Until next time... I'll be sharing my experience with Shellac/Gels. Let me first say, it's not as easy as I'd hoped. LOL


Cheers!

Angélique

June 11, 2014

Homemade Handy Mani Salve

Welcome to the first post of my three part series on The Perfect Manicure At Home!


Say Hello to a Simple DIY Hand Salve!!

Ok, a few reasons why doing my nails at home is important to me...
  • Creative/Fun
  • Money Saving (compared to salon visits)
  • Quality Control (using homemade & natural essentials)
  • Time Saving
  • Challenging/Mindful
  • It's my Girly Obsession!

I'm an avid & curious DIY-er. Doing my own nails makes me feel like I've accomplished a great feat. The only problem is that I spend hours on my home manicures and they almost always smudge. And, rarely last longer than a week without noticeable wear. So, I thought "Hey, since there's all this hype about Shellac/Gel nails, why don't I just try it myself?" Ya! That's right baby! And I'm gonna share my first time with all of you!

But, before we get started, and since I'm on this natural kick -just saying NO to commercial brands- here's my homemade recipe for an All Natural Hand Salve that will make your hands say thank you...


"Easy Peasy" Hand & Nail Salve

2 Tbs Camelia Oil
2 Tbs Shea Butter
1 Tsp Soy Lecithin
1 Tsp Vitamin E


The good thing about salves is that they don't require preservatives and still last a while. However, I use vitamin E in almost every skin care recipe. Vitamin E is high in antioxidants which are both good for your skin and work to keep the final product from oxidization. Since there is no water in this recipe, the use of a full spectrum preservative is not necessary. This recipe should last about six months.

I buy most of my ingredients on line. I admit, I'm a bit obsessed with shopping on line. I just love surfing the Net! The ingredients for this recipe come from three of my favourite wholesale sites. Click on any ingredient in the list and a new link will open with the wholesale site I purchased that item from. 

You can also check out your local health food stores. Feel free to use any brands you like. This recipe isn't too fussy! I picked the ingredients based on what is best for hands and nails, as well as ingredients that have super healing properties for the days when your hands become dry & cracked from weather and hard work. This recipe is best used during a manicure or at night. It can be used any other time too, but you might need to wait a few minutes before handling things as your hands will be slippery until the oils absorb into your skin. It really only takes five minutes max! :)

Measuring spoons & cups, dropper and the ingredients...

Measure out your Beeswax, Shea Butter, Almond and Camelia Oils, Vegetable Glycerin and Soy Lecithin.

Place in pot filled one third with water... You're basically creating a make-shift double boiler. It is imperative to heat on low...
Unfortunately, I was distracted by taking pictures and didn't pay attention to the heat. It was almost all the way at medium! OMG!! So, the Vegetable Glycerin over heated and bubbled up... As you can see in the picture below, those bubbles on the surface are the Vegetable Glycerin. Now, for this recipe you can still use it. It won't hurt the salve... But if you ever over heat Glycerin in a deodorant or lotion recipe, you'd have to toss it and start from scratch. Let my lessons learned be advice to you! lol

Remove from heat and let cool a bit. Add the Vitamin E and Essential Oils...

Pour into sterile tin containers. I find these containers at New Directions Aromatics. They are my fav because they have screw on lids which makes it easier for people of all ages and abilities to open and close the container properly. And all of this helps prolong the product's shelf life.

They also come in various sizes...

Ok, now cover em up with a paper towel. This ensures no dust or, ahem, cat fur gets in there while the salve cools. lol

Leave it for about thirty minutes and when you come back it should look like this. See the bubbles? That's the Vegetable Glycerin. Once you rub your finger in there to scoop up a bit, the bubbles will disappear. These babies are ready to be capped now!

I keep the big one in my manicure kit! I gave one to my niece. And I keep the other small one at my work desk. This recipe makes six ounces...


So, I have a serious question. Will you try making this recipe yourself? Would you be interested in purchasing when I make it available to the public? Hmm... I am full of curiosity! Feel free to comment. I am interested to know what y'all think!

Stay tuned for my next post of the series... Spoiler alert! It's a natural cuticle oil!

OXXO

Angélique

June 1, 2014

Sunrise... Sunset...

Hello, It's morning in these parts of the globe. Much past my bed time. As some of you may know, I have Narcolepsy. And since I work nights, I sleep during the day. So, for the moment, I am suffering from insomnia as Narcolepsy is an umbrella term for multiple sleep issues.

After midnight is when I'm most creative! And, since I don't have kids- I take advantage of it. Or, I just vegg on the couch surfing the Internet while a movie plays in the background. I research and read other blogs and take notes and make plans. Then, I have moments of wonder, how much will my life change when I meet someone? Where does another person fit into my life? Really- I am completely backwards! I often worry that I might be too independent. Goodness, hopefully he will find me... ;)

On an incredibly awesome note..! I am planning to try DIY Shellac/Gel Nails at home! I ordered all the necessities and essentials, a light, bottom and top coats and six colours (seriously? Can you say addicted? lol). So, I'm super stoked for all that to arrive... but, I ordered each item from various sights and vendors. Which means at least ten days till I'm up and running. It's gonna be awesome! I'm especially excited for the part when I receive parcels in the mail. I'll be making my own Cuticle Oil and Hand Salve to condition and treat my hands, nails and cuticles. So, I'll let you know how that goes. Sooner than later.

I'm kinda in a bit of a dull mood for the last few weeks. I haven't been crafting lately. Although I did finally make my hair spritz, "Sea Breeze".  But the recipe is just a quickie.

The nice weather's here and I'm too screwed up to enjoy it! I would love some time in the Sun without needing a nap afterward. But I have to lather up in sunscreen and still the Sun gets to me! This is also why I sleep during the day. Sometimes I think I'm half vampire... I wish for a time that I can wake with the Sun again. And go to bed with the Moon! I've been on nights forever it seems like. I am not complaining, though. I am happy and thankful I have a job! It's a good job. It doesn't fulfill me. But it pays the bills and suits me for now. I really want to work from home and write/blog full time one day. By the time I'm forty let's say. This is all just a work in progress. However, I am ready for what the Universe has to offer.

_/|\_

Angélique